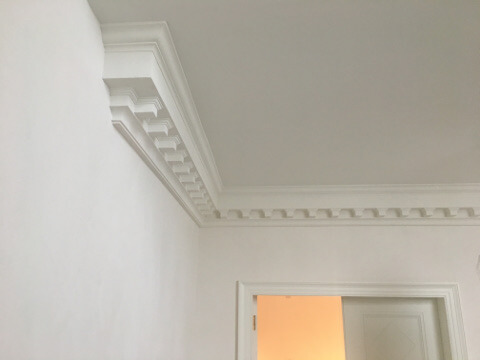
Though we always advise that you go the professional route and have your mouldings installed by a craftsman, there are means of installing covings on on your own. Consider the following tips, and you’ll know what to do to perform the installation as professionally as possible.
The first step: assembling the tools
When dealing with covings, the basic too you will need is a saw. Choose a solid, stiff saw that feels comfortable and secure in your hand. You will also need a mitre box that is big enough to fit the coving that will be cut. When preparing to make the cut, make sure that you’re propping the cornice against the back plate of the box. You will also need an adhesive in order to properly implement the coving. It is recommended that you utilise specialised coving adhesive, which usually comes in 25kg bags. The same adhesive will be used to finish all the joins and corners as well. It is very important to check if your room temperature isn’t below 10 degrees – if it is, the adhesive will lose its properties and won’t bond the materials correctly. Other tools you’ll need include: a pencil, ruler, hammer, nails, sanding sponge, water, filling tool, as well as a paintbrush. Fantastic Section of Building / Fitting guides you’ll find here.
Step two: cutting
After gathering all the tools, it is time to cut the coving. Use firm strokes with your saw – don’t go too quickly or too forcefully, as you might damage the cornice or injure yourself. Grip the coving with your non-cutting hand to make sure it doesn’t slip or otherwise move in the mitre box. Do try to make sure that the coving is always level so you don’t make any sloping cuts.
Step three: fitting
Always start the fitting from the first corner you can see as you enter the room. If the walls in your room have any outward corners, such as a fireplace, you should start the fitting there instead. Make sure the area of the wall where the coving will be fixed is clean before you start the fitting process. Next, draw a line at the height you want the coving to be around the entire room. You might be tempted to measure it with reference to the ceiling, but the ceiling may not be level, so use a spirit level to make sure your line is parallel to the ground. Use pin nails around every 500 mm to create temporary supporting guides – any holes left behind will later be filled up with the adhesive. Make measurements along the wall and then transfer them to your coving, optionally marking the line in the direction you will be making the cut. Cut the coving and check if the two covings meet in a satisfying way – don’t worry about keeping a perfect 90 degree angle.
Apply the coving adhesive to the entire length of the back edges of the plaster in the areas where it will meet the wall and ceiling. Add more adhesive to areas where it will meet the other piece to ensure a strong adhesive effect and prevent cracks from appearing in the future. Make sure to clean up any excess adhesive – you can use it to fill the gaps between joins as well as between the coving and ceiling. Leave it to dry and later come back to remove the nails, filling up the holes with the rest of the adhesive.
The final step
After 24 hours have passed, you can proceed to paint your coving. Though there are many types of paint that will provide a satisfying effect, water-based emulsion is the most reliable way to paint on plaster mouldings and ceilings.
